Replacing window frames is a relatively simple task, so long as you are removing an existing window frame and replacing it with one of an identical size.
Your tools:
- Drill
- Masonry and Wood Bits
- Tape Measure
- Spirit Level
- Hammer
- Saw (Wood and Steel)
- Crowbar
Before you start
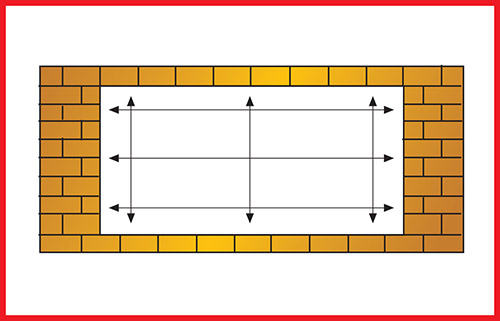
To calculate the frame size needed, you must carefully measure the existing brickwork opening size from the outside. NB. Do not measure the existing window frame which will be smaller than the brick opening. If the wall around the existing window is plastered over the frame, chop back some of the plaster to bare brick for accurate measurement. Accurately measure the height and width in at least three places and use the shortest measurement.
Removing the old window
For safety and security, make sure you have the new window frame and have checked the size and condition before you remove the existing frame.
Start the frame removal by unscrewing and completely detaching any opening sashes at the hinges.
Rake out the putty holding the glass and extract the small metal glazing nails. You will have to use an old chisel or a similar tool to chop out the old, hard putty. Take care not to break the glass.
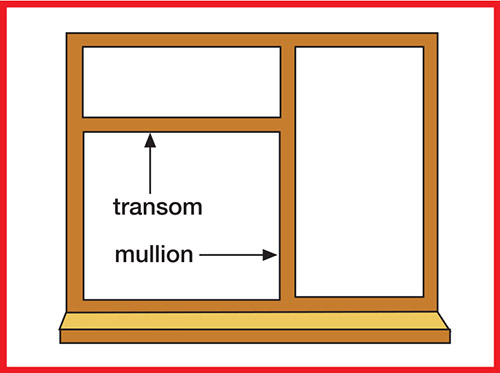
Remove the glass completely and put aside carefully. With all the glass and opening sashes removed, you should be left with just an old frame still attached to the brickwork, probably with nails, so it needs to literally be cut out of position. Start cutting through the transoms or mullions, removing them completely.
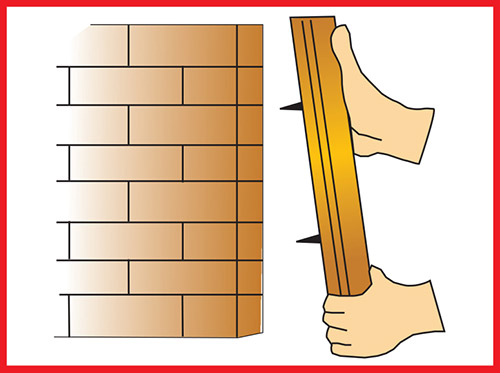
Cut through the side jambs at an angle, about one third of the way up from the sill. Take care not to damage internal plastering. Insert a crowbar behind the cut jambs and lever away from the wall.
NB. Place a flat piece of wood between the brick/plaster and the crowbar. This will reduce any damage to the hard surface when pressure is applied.
Once you can get a sufficient grip on the jambs, use your hands to completely pull out the old timber.
Remove the head and sill in similar fashion, cutting through them, then levering away. There may still be ‘horns’ embedded into the brickwork at each side. These horns should pull easily out of the wall. The resulting holes should be filled with mortar mix since they cannot be used again. Check the opening, remove nails and traces of old mortar to leave a clean, clear opening.
Installing your timber window
Standard-sized windows bought off the shelf are not supplied with glass. Glass can be purchased from any local glass merchant.
With the brickwork opening prepared and the window deglazed, the frame can be lifted directly into position from the outside. (There should be a gap of about 3mm from side to side and top to bottom between the brick opening and the frame.) These gaps will allow the frame to be aligned correctly and set squarely. Set the frame into the opening so that the drip groove on the underside of the sill is well clear of the outside wall. Get the sill level first, using durable wedges to push the frame head up against the lintel above. Check that it is level using a spirit level, adjusting the wedges as necessary.

Now align the jambs - the vertical frame sides. They must be perfectly vertical. Again, use the spirit level on both the outside faces and the glazing faces to check that they are vertical. Use wedges to hold the frame in the correct position. Check the positioning by measuring the frame diagonals. They must measure exactly the same.
Adjust the thickness of the wedges, if necessary, to ensure accurate square positioning. As a final check, unlatch the opening sashes to make sure they do open freely. Secure the frame to the brickwork using the frame fixers. Drill and countersunk clearance holes in the frame and through into the brickwork 150mm from each corner and at maximum 600mm intervals in between, all round.
Keep clearance holes in the centre of the glazing rebate where they will, in due course, be covered in glass. Knock in the fixers and drive home the fixing screws, taking care not to distort the frame.
Once the frames are fitted and glazed, you should “make good” around the frame perimeter on the outside using a quality silicone to ensure that all openings through which water could soak are sealed.
Also ensure that window is treated with a quality sealer to truly waterproof your window to ensure that no warping, etc. occurs.